How to Plan the Best Kitchen Layout: Some Functional Design Guidance
Designing a kitchen isn’t just about picking pretty finishes—it starts with one critical step: planning the right layout. Whether you’re renovating or building from scratch, a well-thought-out kitchen layout is essential for functionality, aesthetics, and smooth user flow.
If you’ve ever wondered how to design a functional kitchen layout, here is some information that will walk you through key elements—from layout types to appliance placement—that will help you create a space that works for your lifestyle.
Step 1: Evaluate the Most Common Kitchen Shapes/Layouts for Your Space
Choosing the best kitchen layout/shape depends on your space and how you use your kitchen. Here are the five most common types:
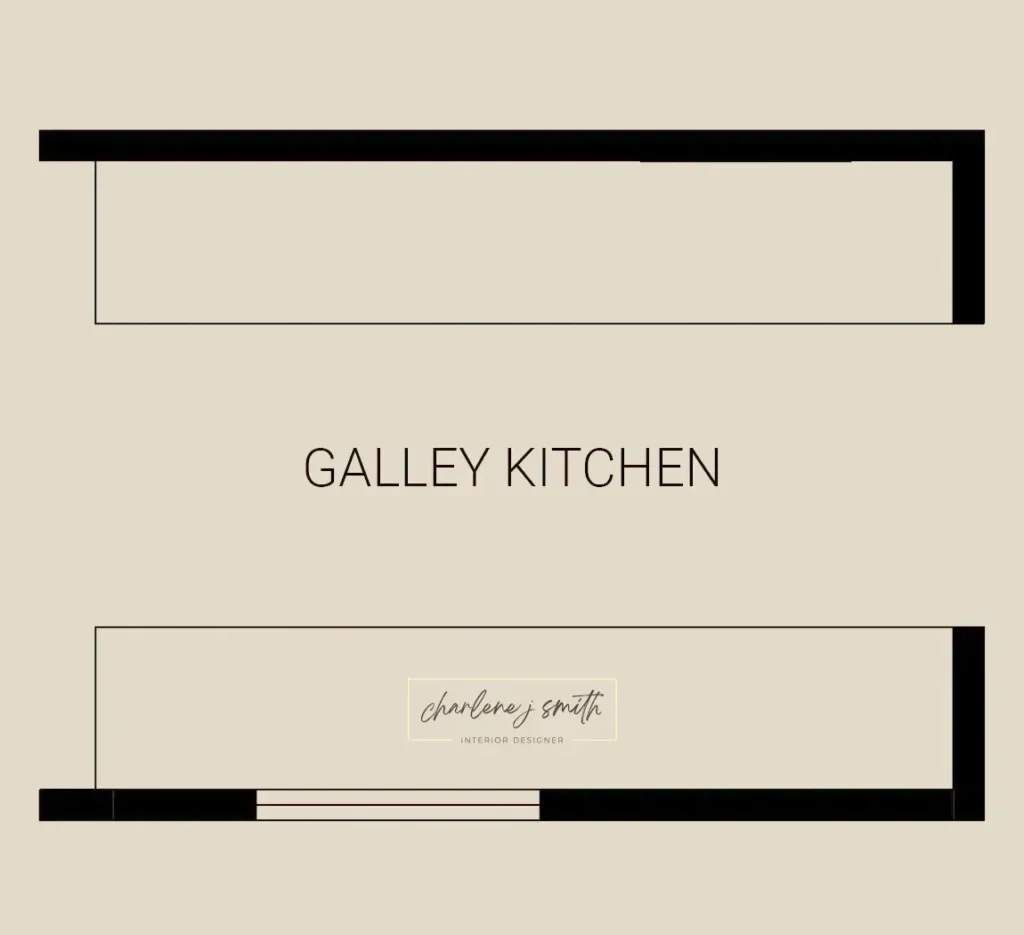
1. Galley Kitchen
A galley kitchen features two parallel countertops with a walkway in between. Ideal for smaller spaces, it offers great efficiency:
- Perfect for solo cooks or tight spaces
- Easy to create a compact work triangle
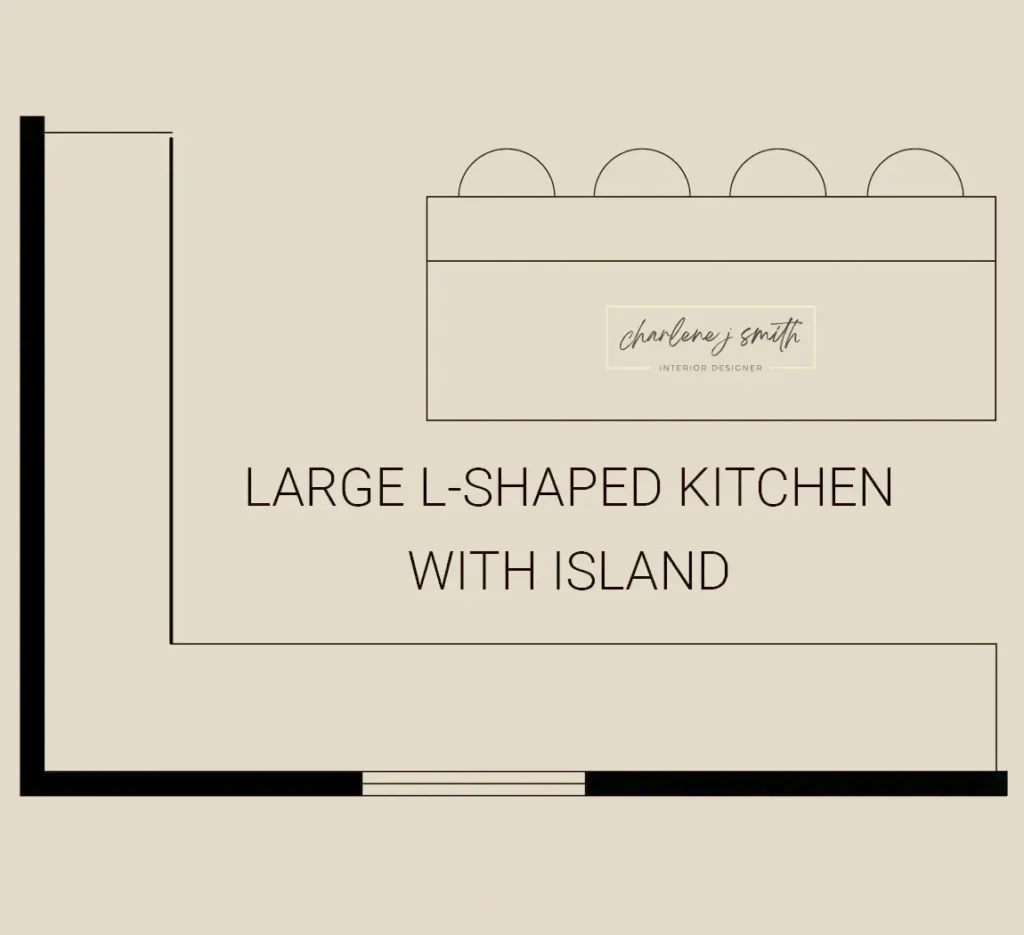
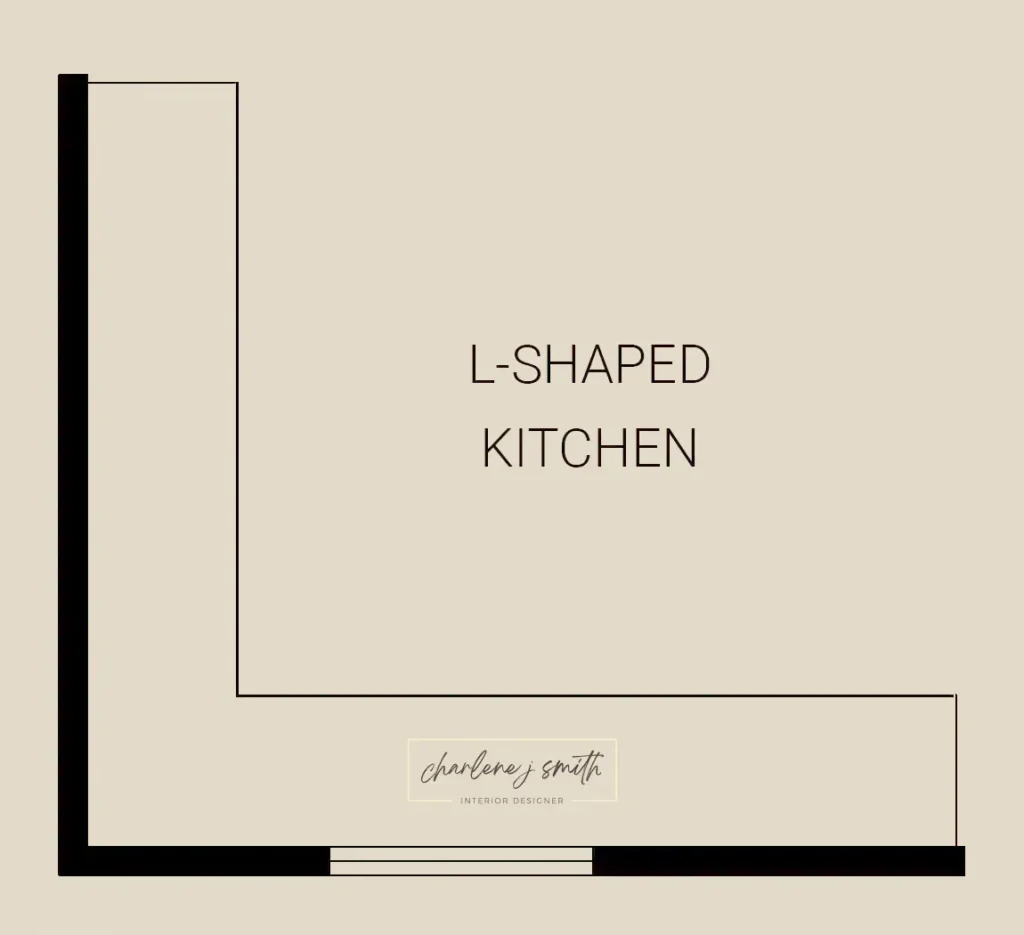
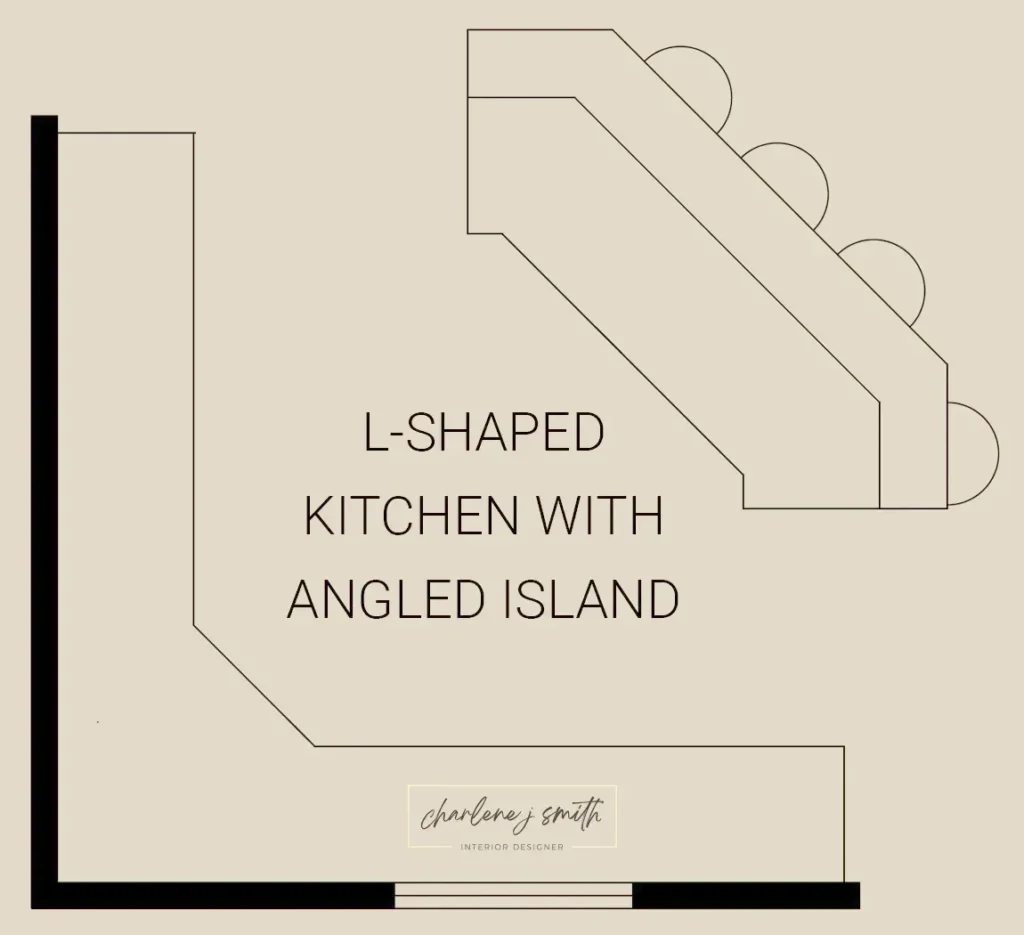
2. L-Shaped Kitchen
This layout places appliances along two adjoining walls:
- Open corner allows space for a dining table or island
- Great for open-plan living
- Efficient work triangle with short travel paths
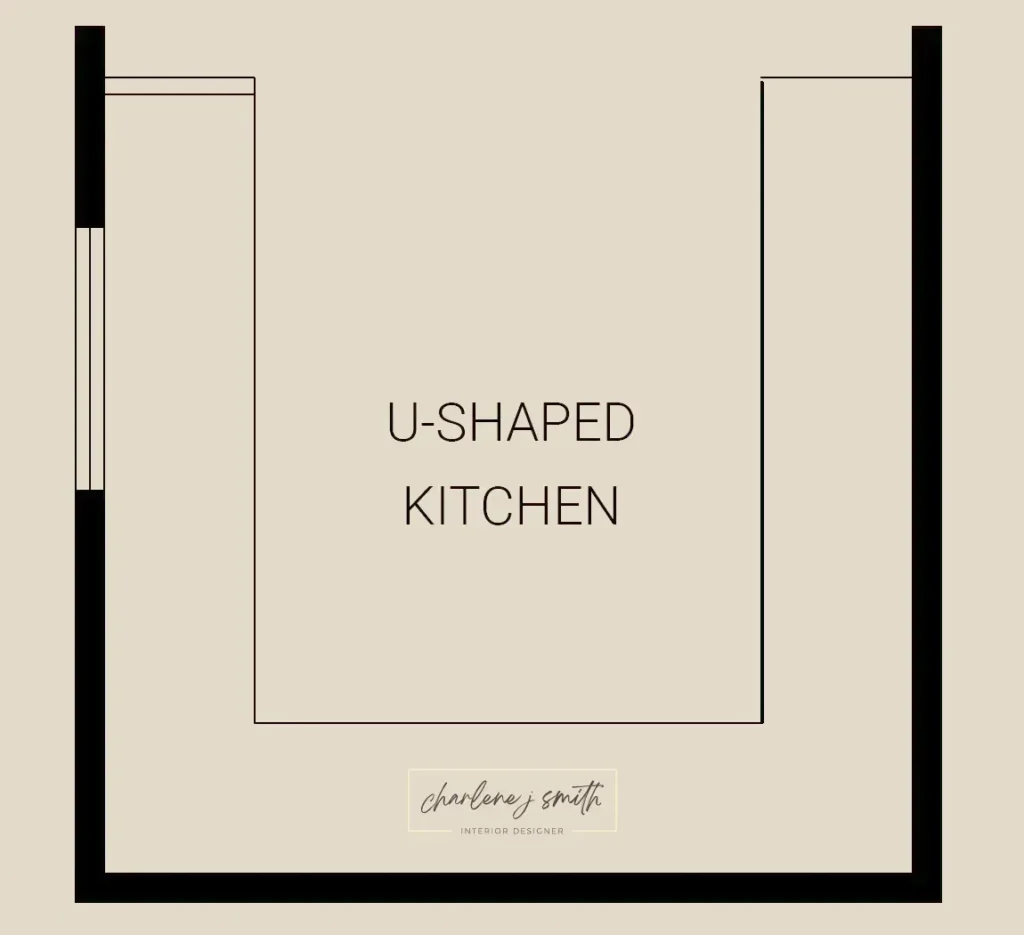
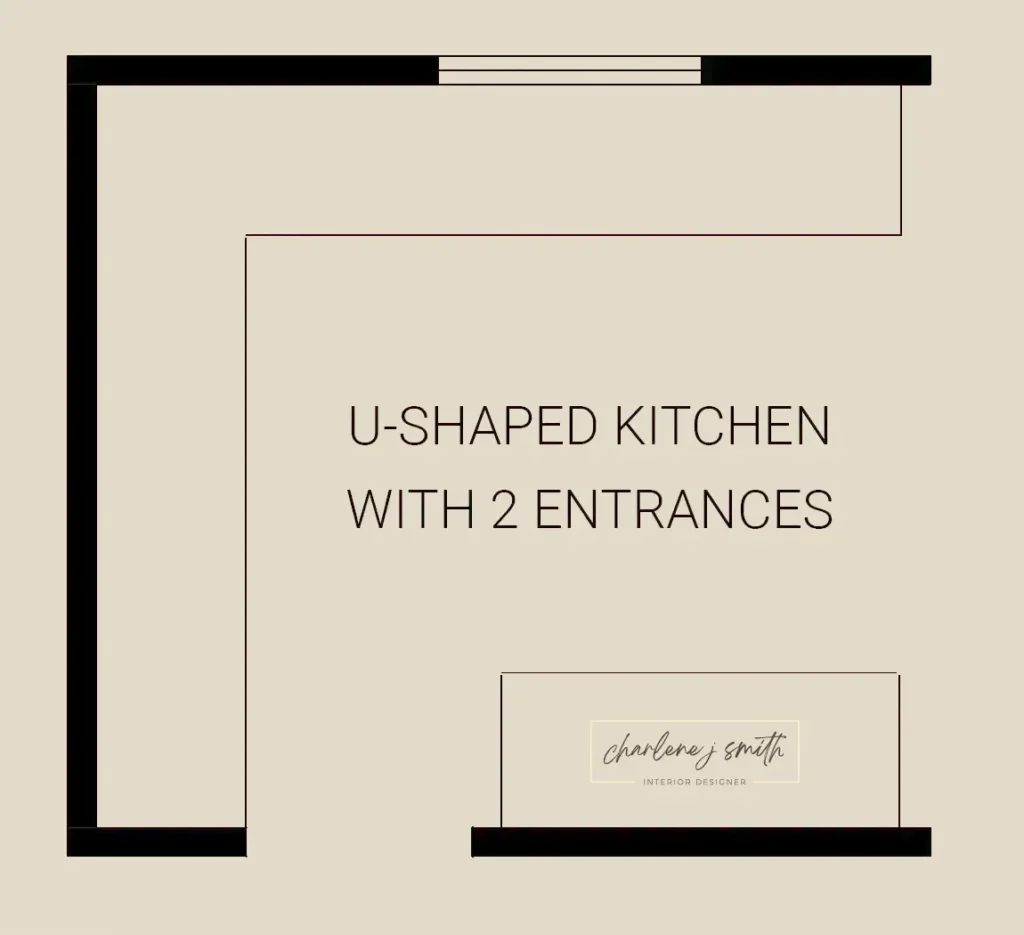
3. U-Shaped Kitchen
This layout is entitled “U-shaped” because it wraps around three walls:
- Plenty of storage and counter space
- Often includes a corner pantry or corner cabinet solutions
- Be mindful of corner clearances and appliance doors
4. Island Kitchen
Adds a central workstation in either an L-Shaped or U-Shaped kitchen:
- Ideal for larger, open-plan spaces
- Great for entertaining and informal meals
- In an L-shaped kitchen, the island can be angled or parallel
- Consider clearance—you’ll need at least 42″ around all sides for comfortable flow
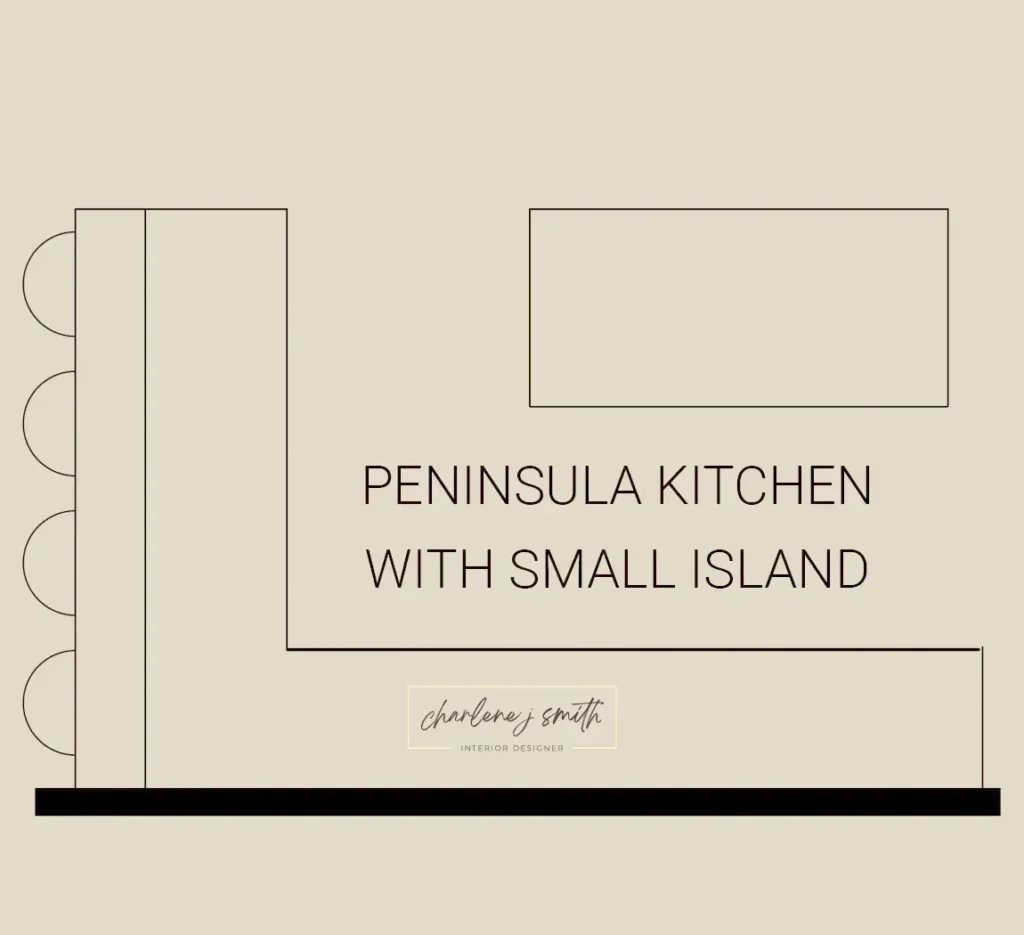
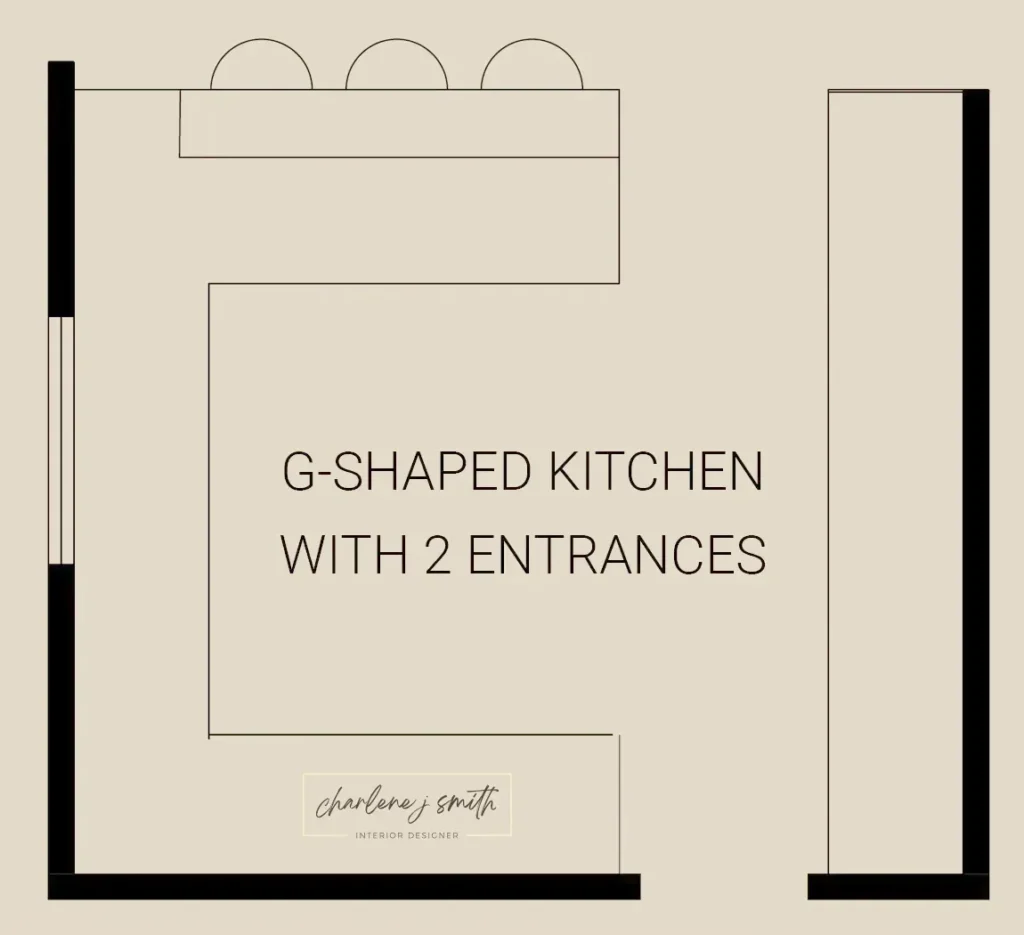
5. Peninsula Kitchen (G-Shaped Kitchen)
Like an island, but connected to a wall:
- Good for tighter spaces where an island won’t fit
- Adds extra prep space, storage, and seating
Step 2: Plan Your Kitchen for Functionality Using Work Triangles
Every successful kitchen layout is built around functionality. That means making sure your space is easy to move through and comfortable to cook in. Think about how you typically move between your fridge, sink, and stove. This is known as the kitchen work triangle—and it’s a fundamental concept in layout planning.
What Is a Work Triangle?
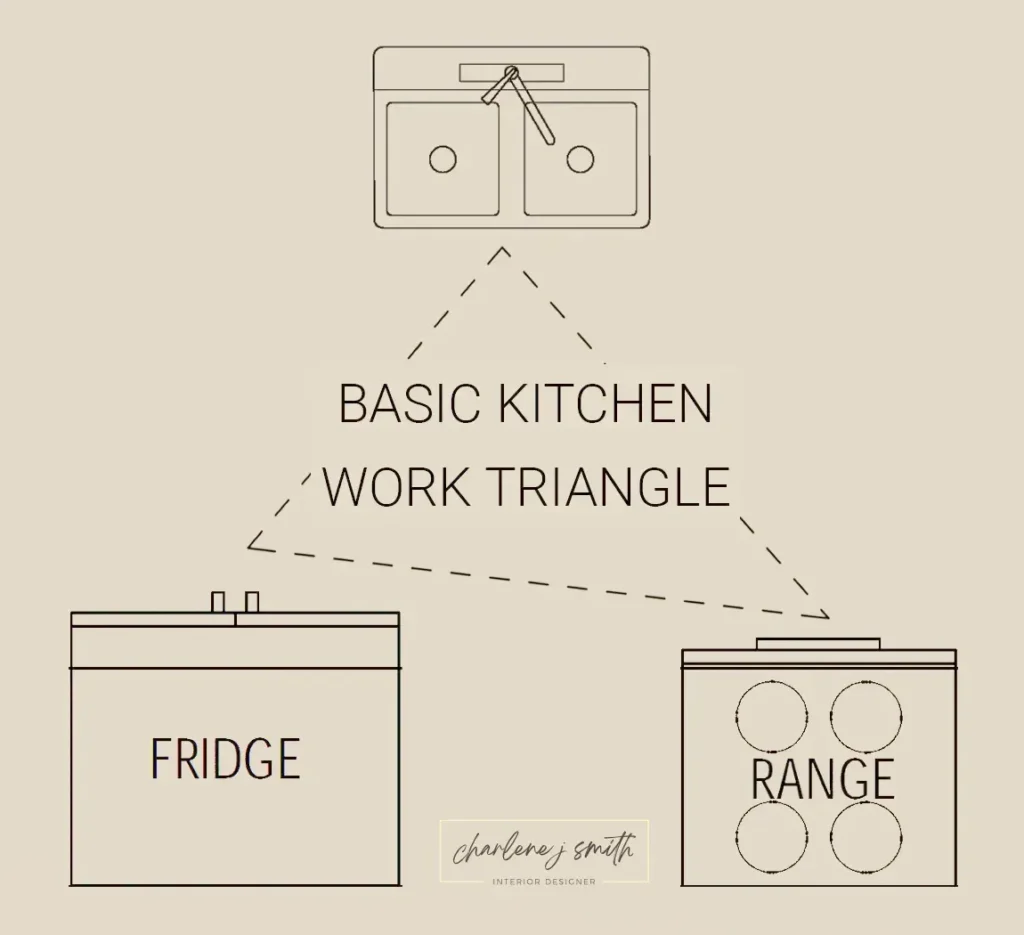
The kitchen work triangle connects the fridge, sink, and cooktop/oven—the three main work zones. For maximum efficiency:
- Each leg of the triangle should be between 4–9 feet
- Avoid placing obstacles (like islands or tall cabinets) in the triangle
- Keep pathways clear and uncluttered for better user flow
If you start with the general shape of your kitchen layout, you can then start to play with placements using the work triangles concept.
Step 3: Think Twice About Moving Walls/Windows, Plumbing, Gas, Ducting, and Electricity
Knocking down a wall or changing your kitchen layout and/or appliance locations can truly make your kitchen so. much. better.
However, before you start planning these changes, start by noting the current locations of walls/windows, plumbing (water lines for fridge/sink/dishwasher, drainage), ducting/ventilation (for your range hood fan), gas, and electricity (110V or 220V). The current placements are certainly not always the best or most functional, BUT, unfortunately, that’s not the only factor to consider when deciding whether or not to move them.
How Layout Changes Impact Your Renovation
Should you choose to add/remove/move walls, windows, plumbing, ducting, gas, or electricity, the scope of your kitchen renovation project increases—and so do costs and timelines (think thousands of dollars and multiple weeks).
Not only is the work more specialized/complicated (demanding skilled professionals), but all of these usually require permits, which typically involve municipal applications and fees (sometimes necessitating drawings/schematics), application review timelines, as well as the inspection and approval process. Find more information about renovations permits (and insurance) here.
Be Clear About Your Goals
So, before you decide to knock down a wall, change a window, or move around any of your ducts or utility lines, you’re going to want to revisit your goals for the renovation. Get clear on WHY you want to renovate and weigh the cost vs. the benefit of the added costs and duration against your goals.
- If creating a more functional space/layout was one of your key criteria, it makes sense to invest more here—you don’t want to end up with a half measure you’re not satisfied with in the long term
- If budget is a big concern, it comes down to prioritizing
- If your priority is updating the look and feel, you’ll probably want to minimize layout changes
- If your layout is just awful and you NEED to change it, you may need to consider cutting costs elsewhere
Step 4: Plan Your Work Zones and Clearances
A kitchen layout is only functional if the core elements are placed thoughtfully. With your overall kitchen shape, the work triangles concept, and an understanding of how layout changes impact project scope, you should be starting to get an idea of how things will come together!
Along with items from Steps 1, 2, and 3, there are some additional considerations for the placement of each of the key pieces of your kitchen:
Refrigerator
- Needs good access from both cooking and prep zones
- Make sure there’s landing space nearby (at least 15″ of countertop)
- Consider water/plumbing needs for ice and water dispensers
- Balance its size with the rest of the cabinetry visually
- Consider accessibility from outside of the work triangle (e.g., for someone just grabbing a drink)
- AND/OR consider a second refrigeration unit (a “libation station!”)
Sink
- Central to cooking and cleaning zones.
- Often located under a window for natural light
- Include at least 18″ clear countertop space on both sides
- Consider your surrounding floor plan (e.g., adjacent to entertainment space?) and which direction you want to be facing
Oven/Cooktop
- Clearance required on either side for safety and prep
- Avoid placing it next to side walls or fridges
- Be sure to plan for proper ventilation
- Do you have enough space for a wall oven and separate cooktop?
- Gas or electric? Does your current utility configuration accommodate this plan?
Dishwasher
- Should be next to the sink for easy loading—and proximity to existing plumbing
- Consider clearance—allow at least 21″ from any adjacent appliances or cabinets
Additional Notes
- Always take into account door swing allowances (think fridge, oven, dishwasher, cabinets)
- Plan for aisles/walking space to be at least 36″ wide (more for multiple cooks in the kitchen!)
- Ensure a minimum of 18″ vertical working space between countertop and wall cabinets
- Think about including dedicated work spaces within your work triangle (not just minimum clearances)
Want to make smarter, more informed choices? Visit the Kitchen Appliance Buying Guide article for more expert advice and money-saving insights or check out my Kitchen Renovation Planning Guide for comprehensive advice on all things kitchen renovation: from design and layout, to construction planning, to choosing the right appliances, cabinetry, lighting, and more.
Step 5: Cabinets, Storage, and Aesthetics
Now that you have some ides about your kitchen size/shape/layout and locations for the key appliances and fixtures, you can start to determine the rest of the pieces.
Cabinets
- Use deep drawers for pots and pans
- Add pull-outs and inserts for functionality
- Consider visual balance and symmetry—keep cabinets spaced evenly, grouped in patterns, and/or symmetrically arranged (e.g., around key elements) for a clean look
- Typically, your cabinet supplier will help you with the specifics of choosing and designing/laying out your cabinetry
Pantry
- A corner pantry offers high-volume storage without wasting space
- For smaller kitchens, consider a pull-out pantry or tall cabinet solution
- Do you want/have room for a separate, walk-in pantry or butler’s pantry?
Windows
- Don’t sacrifice natural light for wall cabinets—balance both
- Consider the overall illumination in your floorplan—do you get enough natural light from other windows?
- Place the sink or dining area near a window if possible
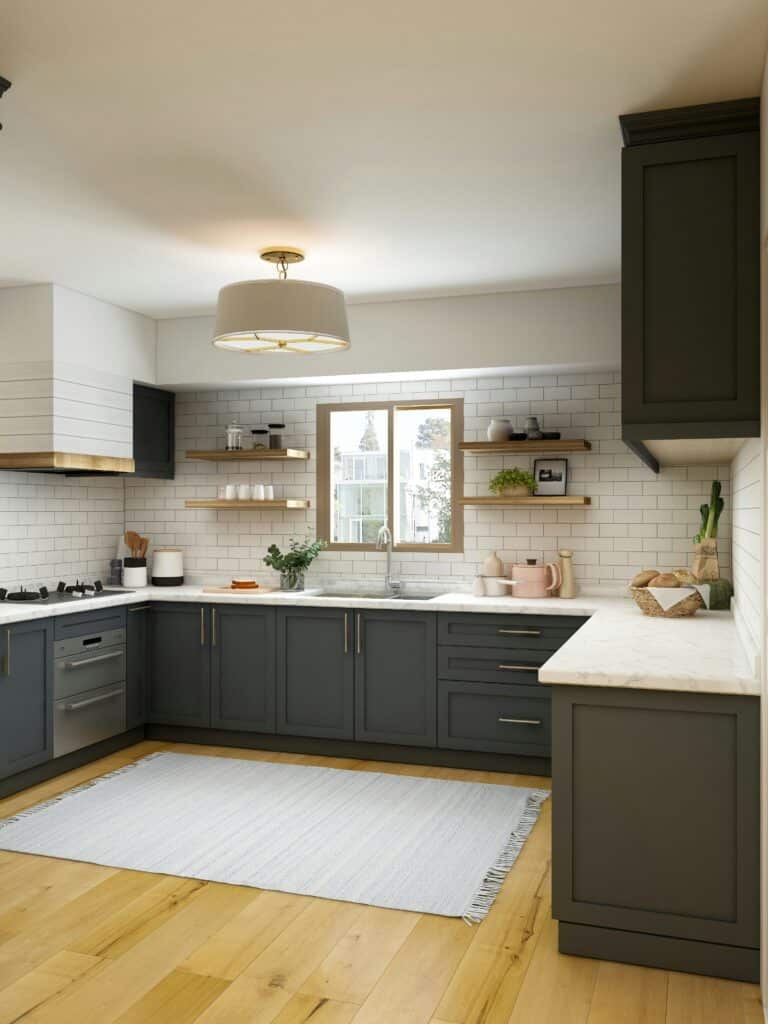
falling4utah via Pexels
Step 5: Add Finishing Touches That Support the Layout
Lighting
- Layer your lighting: ambient (overhead, general illumination like pot lights), task (e.g., under-cabinet), and accent (e.g., pendants/chandelier)
- Over islands or peninsulas, choose statement lights for both function and style
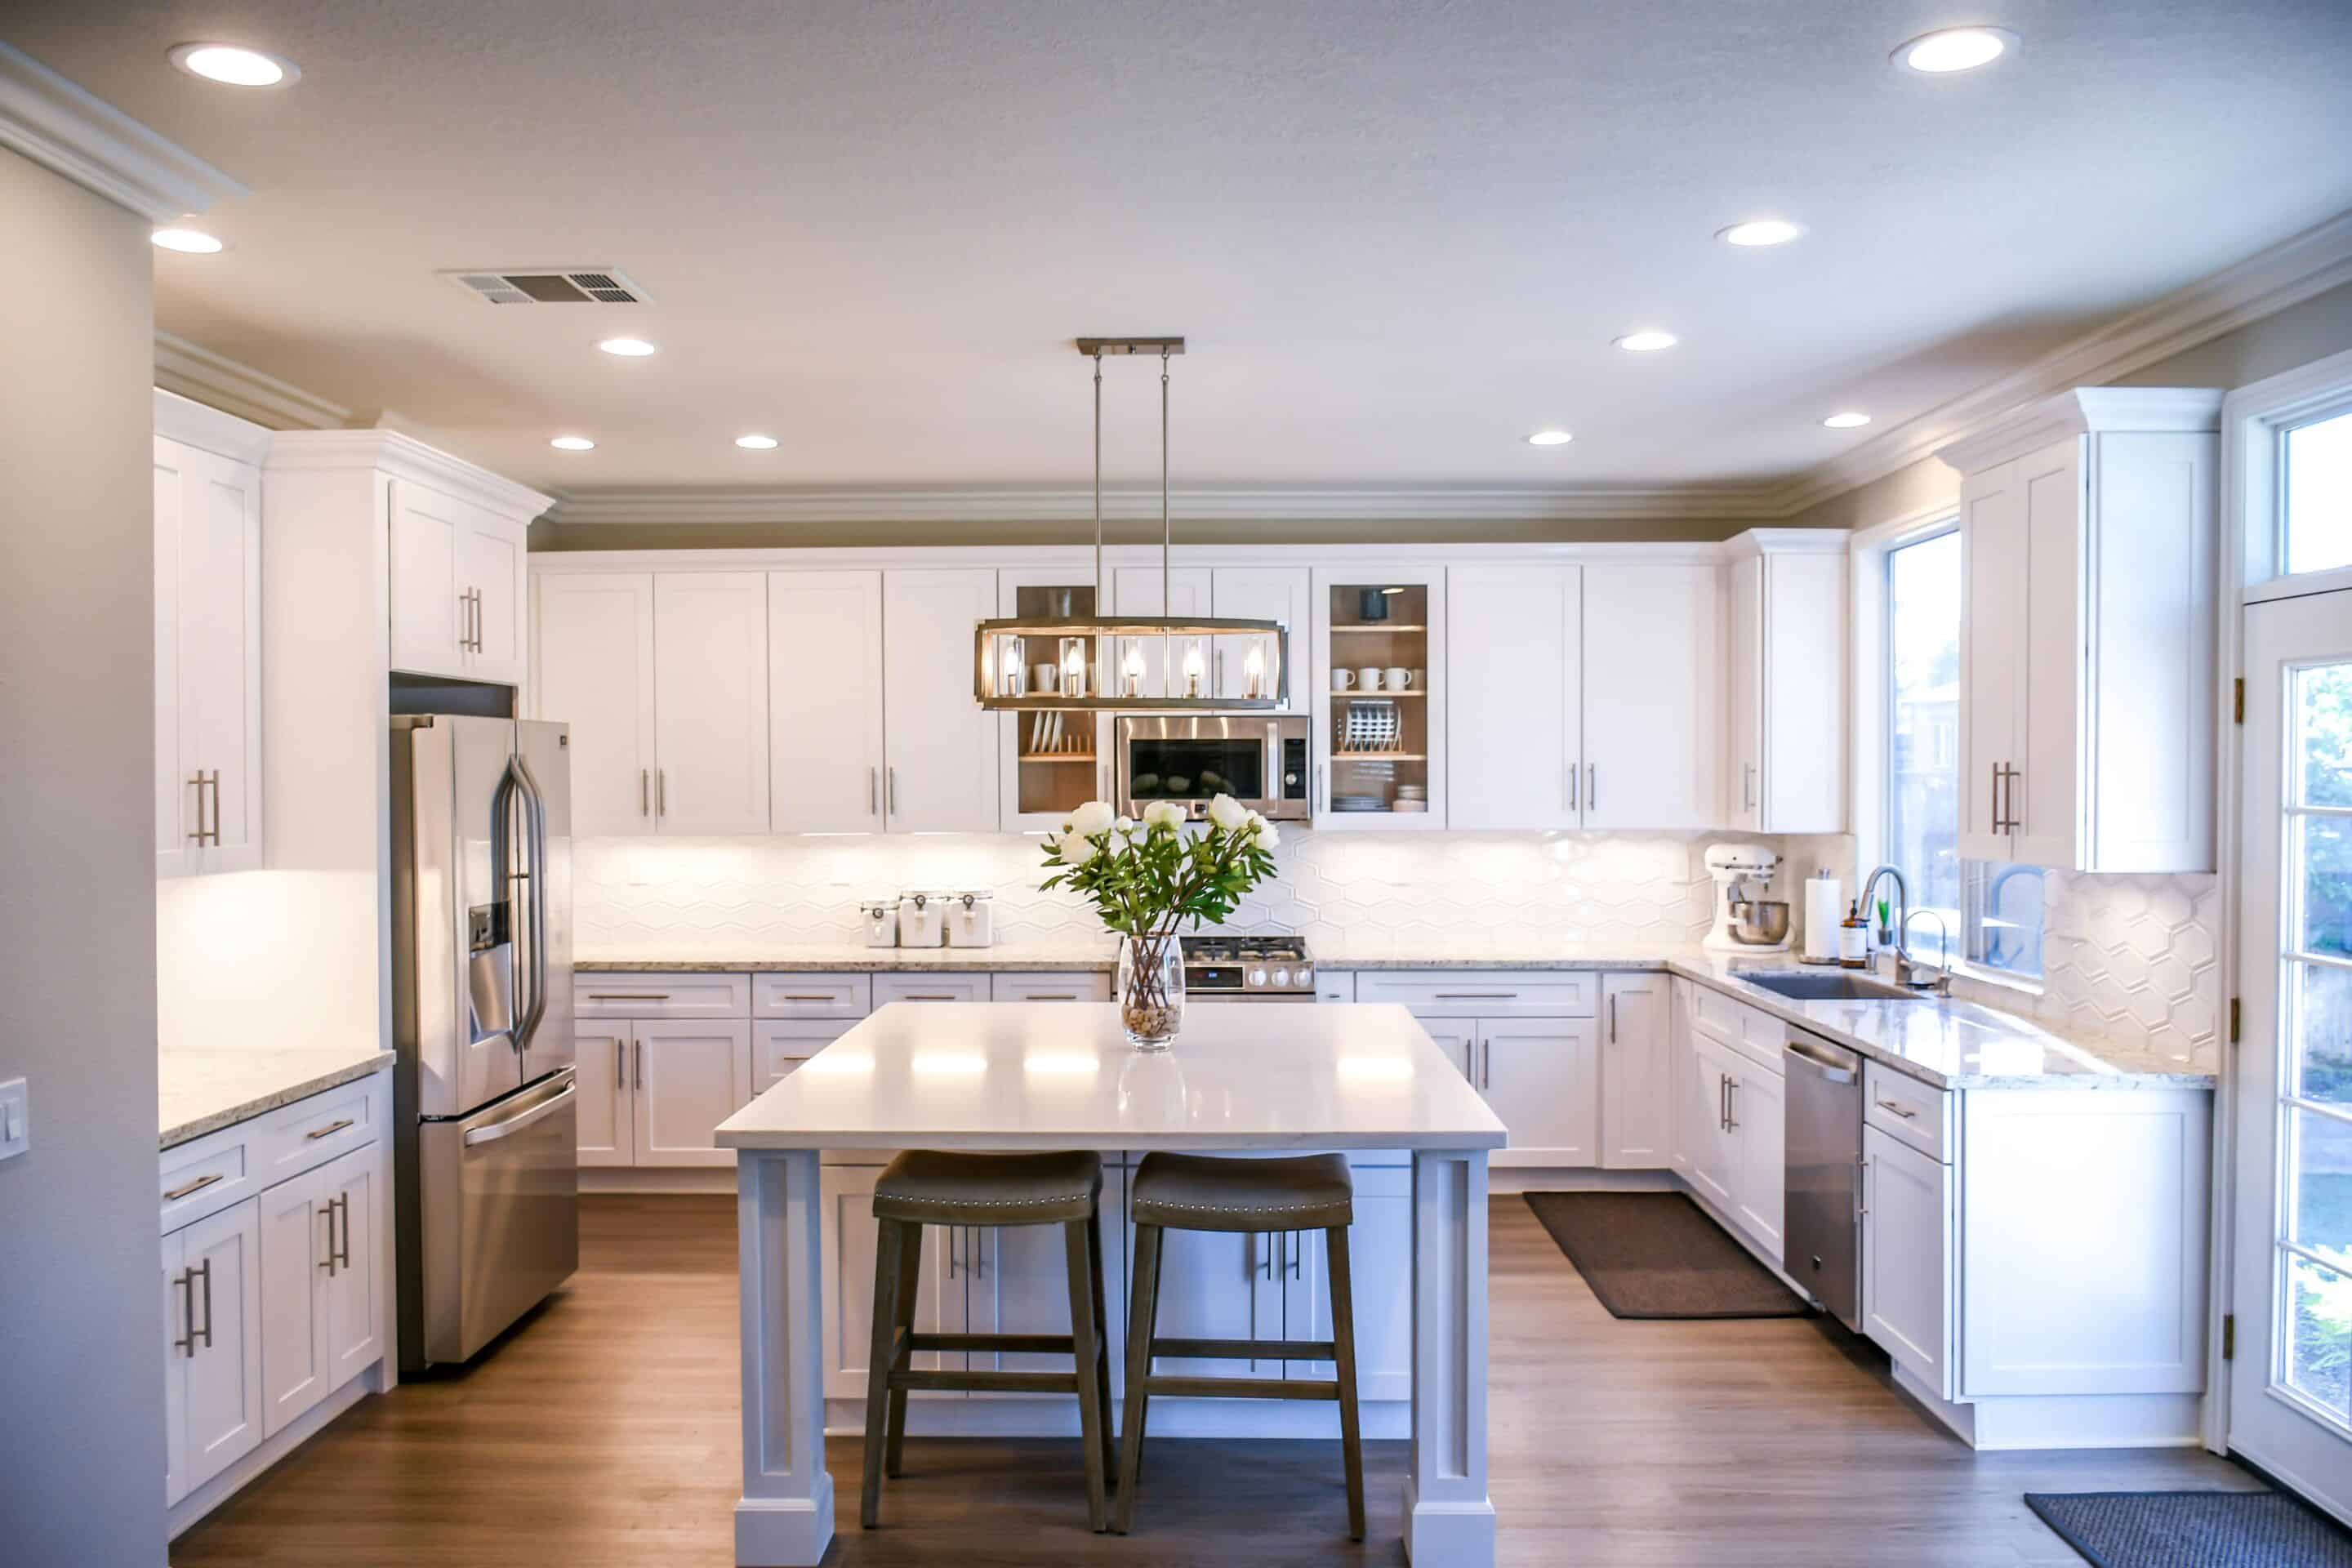
Island or Peninsula
- Make sure the addition doesn’t disrupt your kitchen triangle or clearances
- Consider how you plan to use the space—do you want a sink in the island? Cooktop?
- Add seating, storage, or an extra sink for extra usability
Final Thoughts
There’s no one-size-fits-all answer to the “best kitchen layout.” It depends on your space, daily routine, household needs, and personal style. But when you start with functionality, honour the kitchen work triangle, and design for both aesthetics and efficiency, you’ll end up with a layout that supports how you work and live in your kitchen.
Want to see these layouts in action? Download my free kitchen layout drawings and start planning your dream kitchen today.